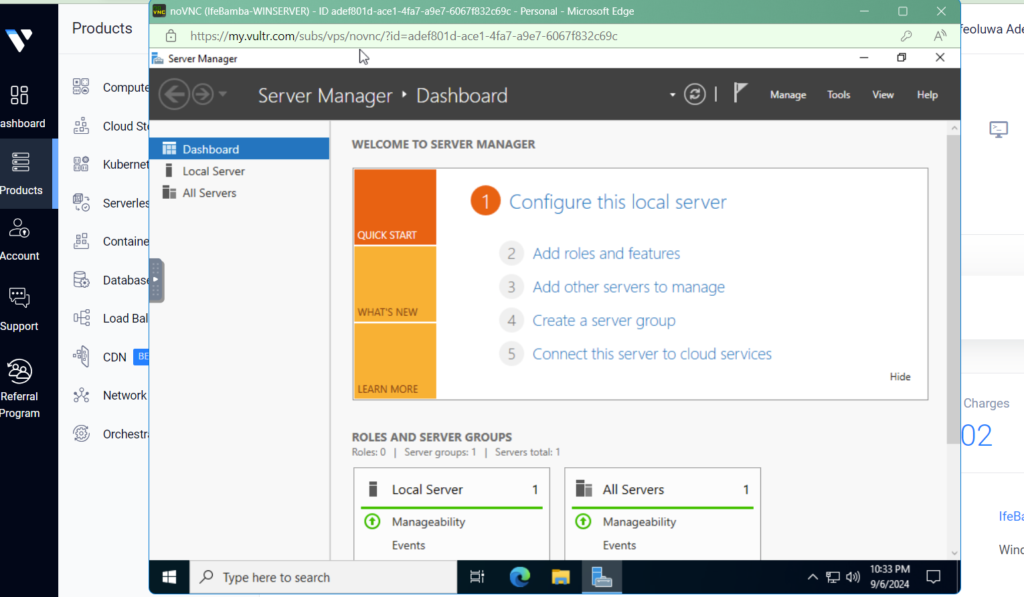
We deploy a windows server as we did our Ubuntu server earlier. The difference is that this will not be in in VPC network, as defined in our Network diagram as the intention is to make it accessible to anyone who may want to access it; this will be a public-facing server and thus, will be subject to brute force attacks – this will be useful for the purpose of our study.
Elastic Agent and Fleet Server Setup
Elastic Agents and Fleet Server
With Elastic Agent you can collect all forms of data from anywhere with a single unified agent per host. One thing to install, configure, and scale.
You have data from several sources that you want to collect, store, search, analyze, and protect, but first you have to bring it into the Elastic platform. Fleet enables you to onboard data even faster and more easily through the centralized management of the unified Elastic Agent.
- Elastic Agent tells the endpoint what logs it should forward to the Elasticsearch or logstash instance.
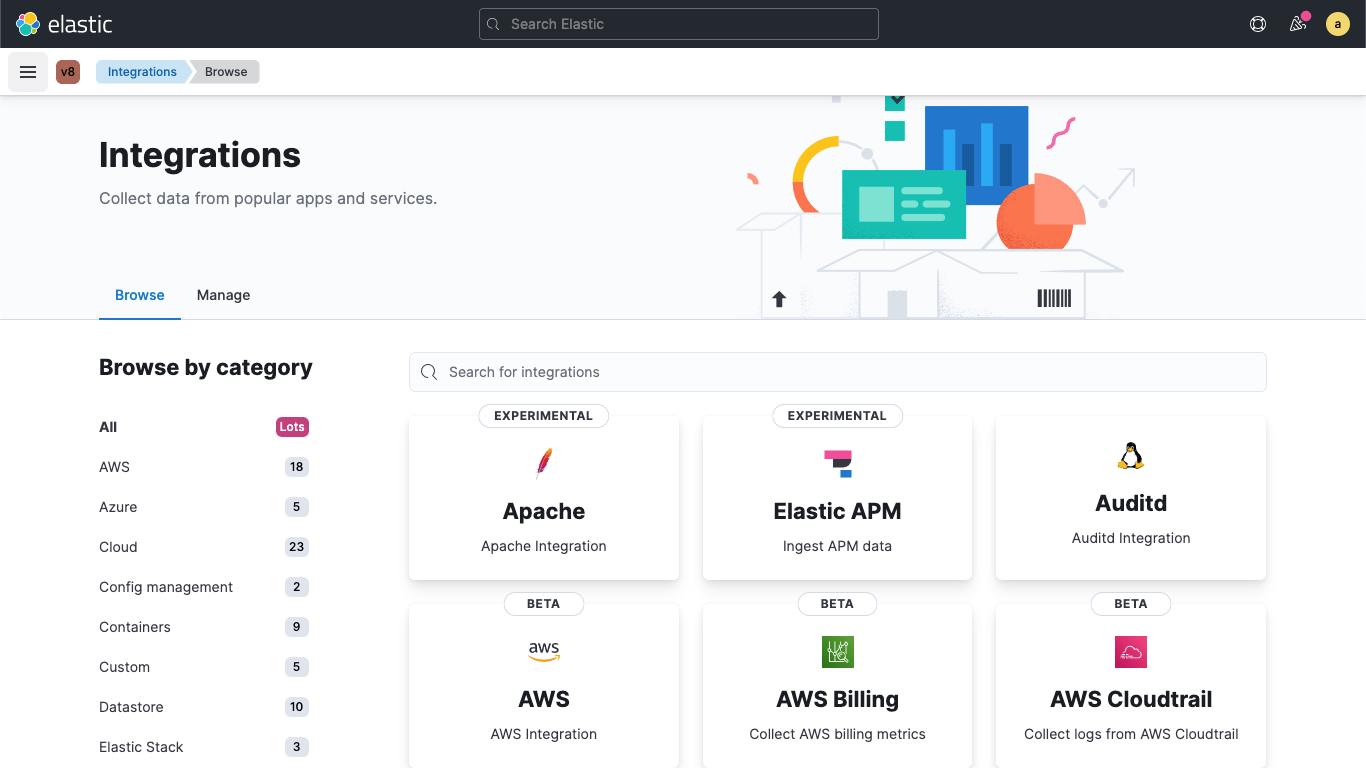
The image below is a screen-grab from the Elastic website:

The Elastic search agents is a single, unified agent of logs, metrics, APM traces, synthetics and securing your system.
instead of installing multiple beats from the different types that we listed earlier, we can simply install one single Elastic agent
Fleet Server is a component that connects Elastic Agents to Fleet. It supports many Elastic Agent connections and serves as a control plane for updating agent policies, collecting status information, and coordinating actions across Elastic Agents
What is Fleet Server?
Fleet Server is a component that connects Elastic Agents to Fleet. It supports many Elastic Agent connections and serves as a control plane for updating agent policies, collecting status information, and coordinating actions across Elastic Agents. It also provides a scalable architecture. As the size of your agent deployment grows, you can deploy additional Fleet Servers to manage the increased workload.
The following diagram shows how Elastic Agents communicate with Fleet Server to retrieve agent policies:

Installing Elastic Agent on Windows Server & Enroll the Windows Server into a Fleet for centralized Management.
Deployingthe Fleet Server:
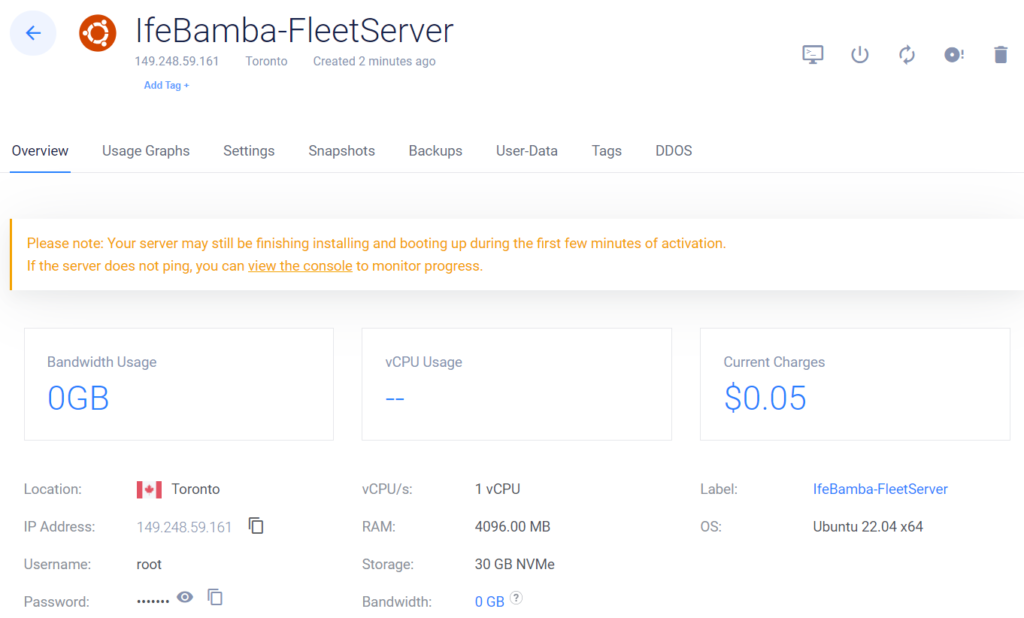
Above is our Ubuntu VM Instance for the Fleet server deployed
Next we, go to our Elasticsearch Instance, click the left side side menu, scroll to the Management Section and Click > Fleet. We are adding a fleet server to our Elastic search Instance.
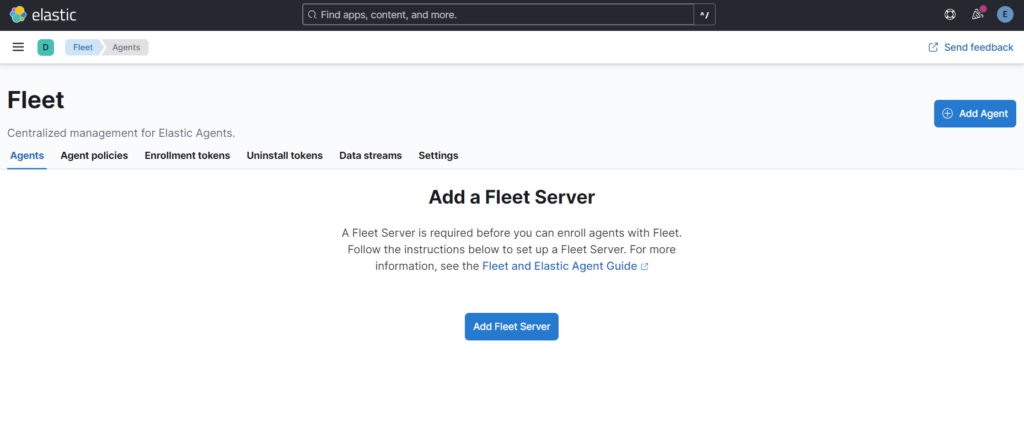
Note that the fleet server uses port: 8220
Click Generate Fleet Server Policy
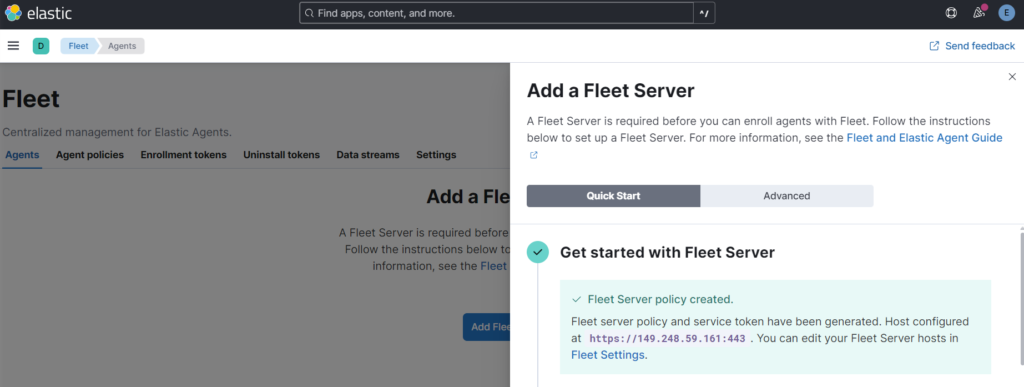
Next we Install the fleet server to a centralized host:
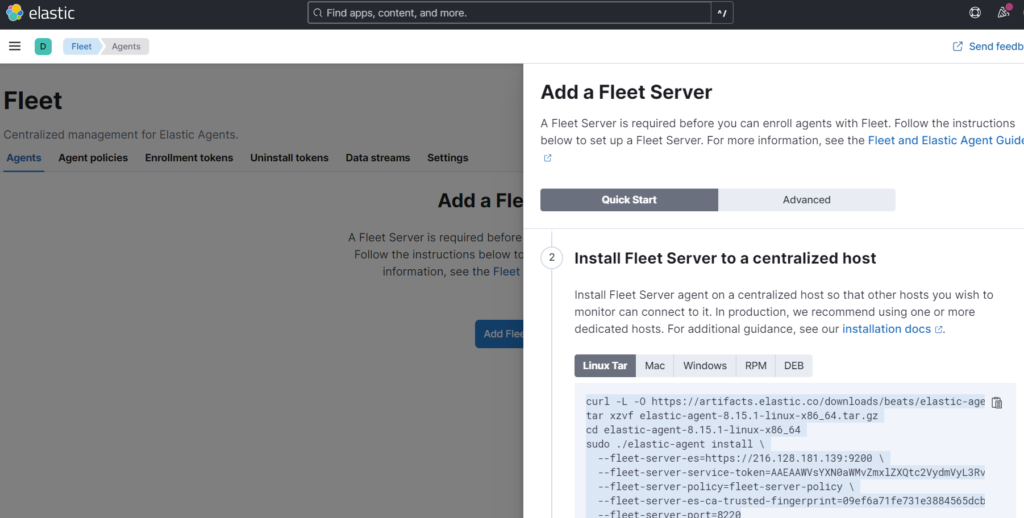
Copy the Linux Tar command in the console and install into the Fleet server instance
We’ll need to Allow the Fleet server IP to access our VPC through the firewall:
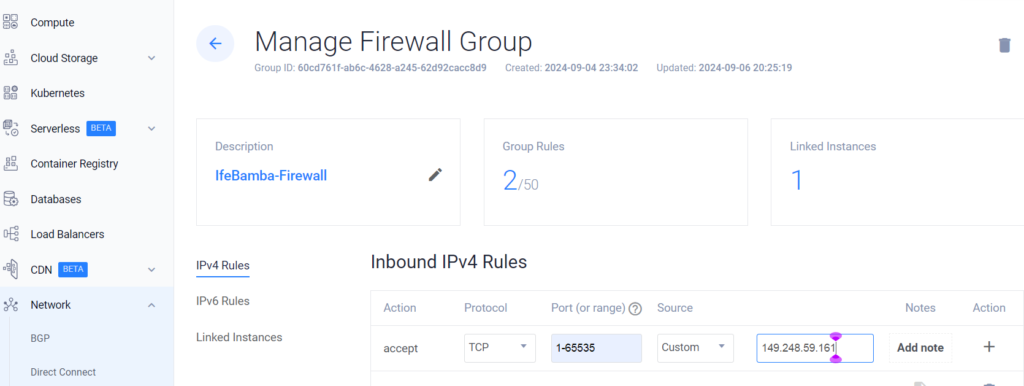
Also we allow the port to access the ELK server though port 9200 – the port for elasticsearch, the fleet server needs to access the Elasticsearch on the ELK server

We SSH into our fleet server and paste the command generated earlier

Elastic Agent installed

Going back to the Elasticsearch GUI: We will see that we now have our Server connected !
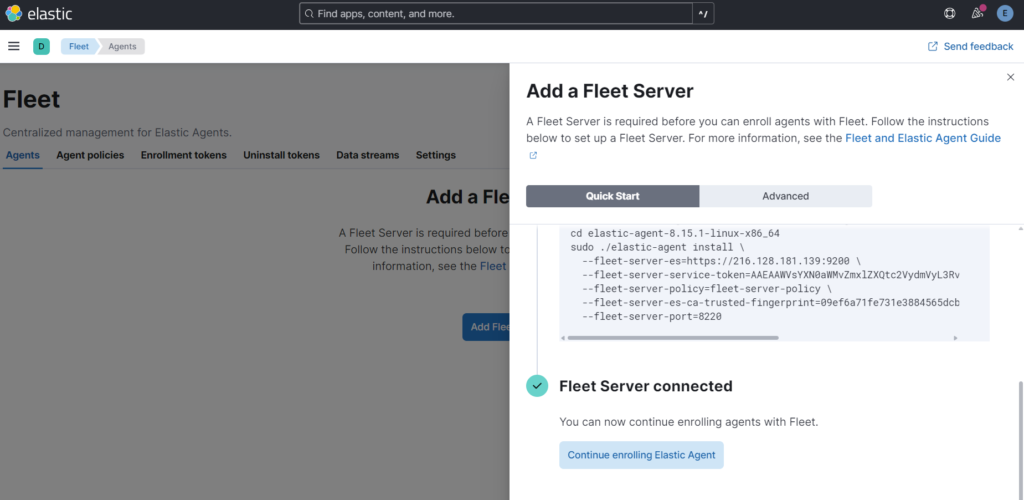
We continue to enroll the elastic agent

We indicate that we want to monitor our windows host and the click on “Create Policy”
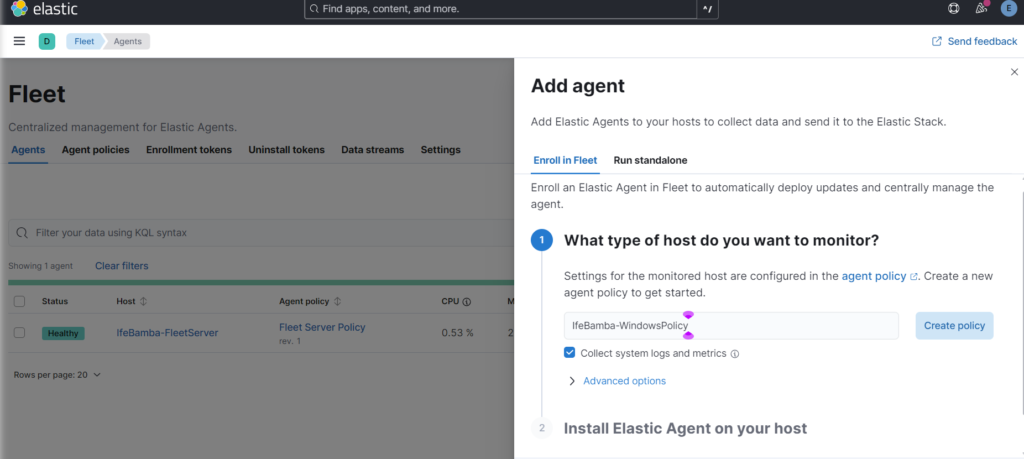
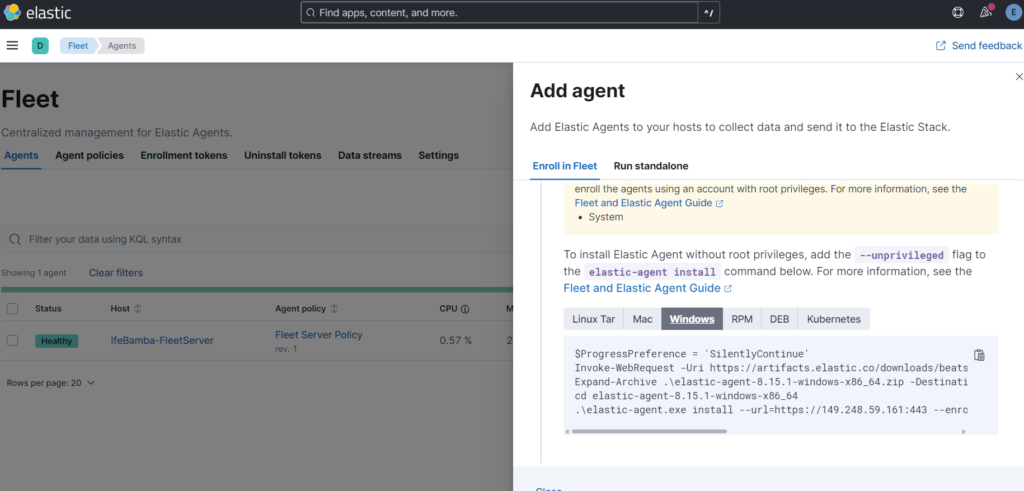
Next we add the elastc agent on the windows host using the parameters provided. Copy the command in the windows tab and paste into the windows server powershell
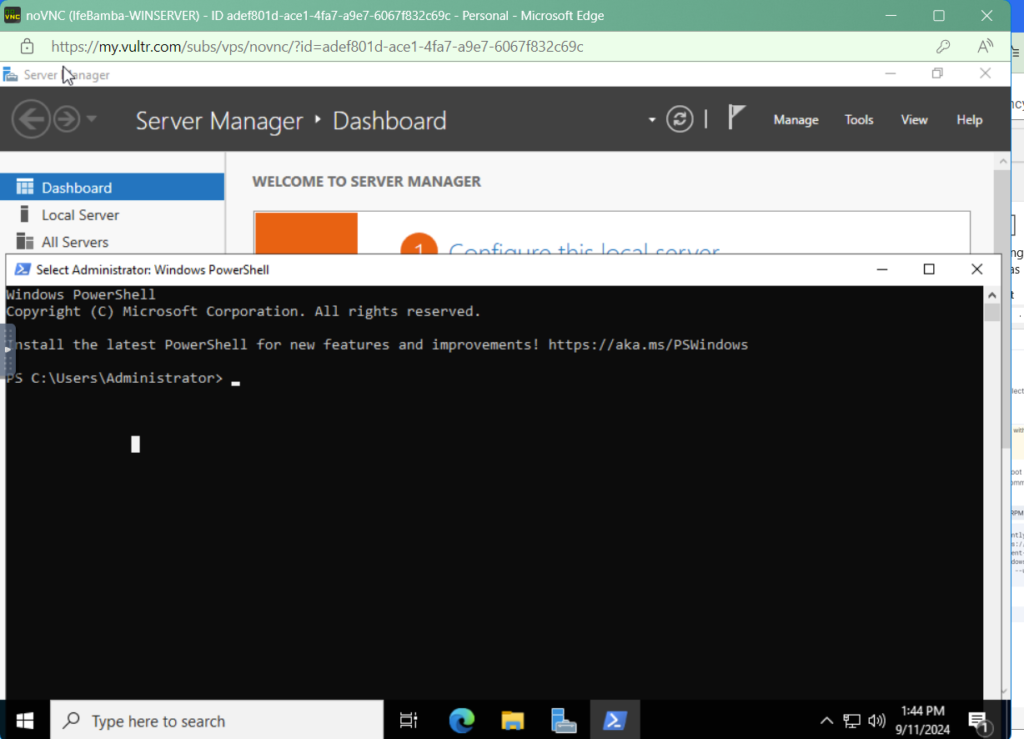
We switch to the windows Sever and open powershell
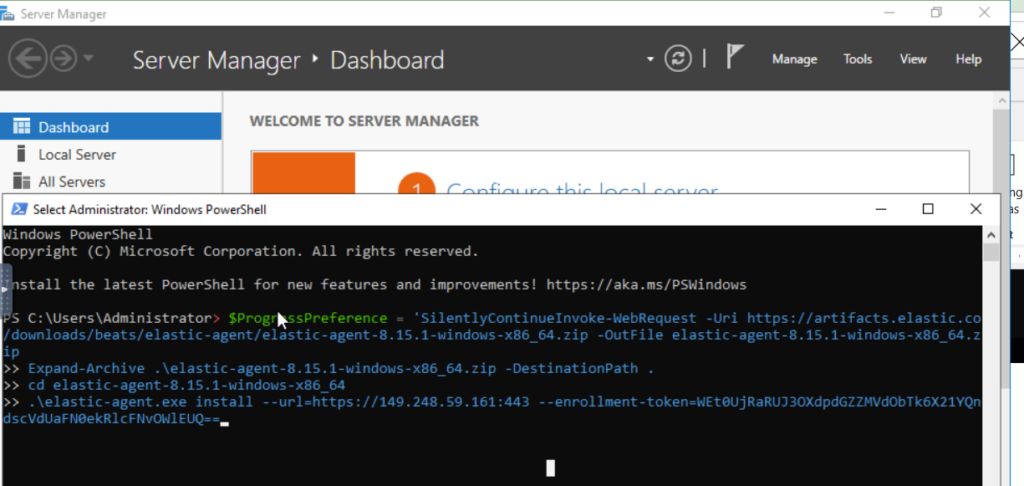
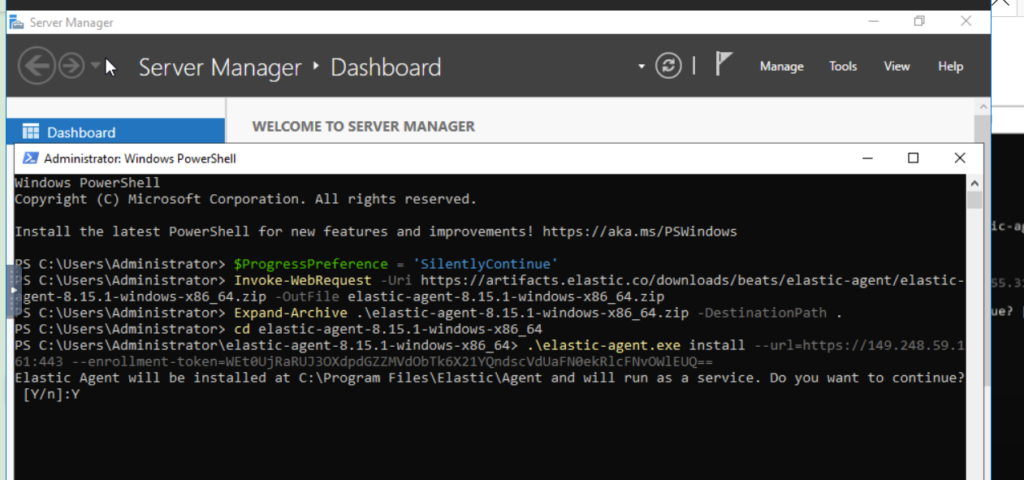
Enrollment failed, see error:
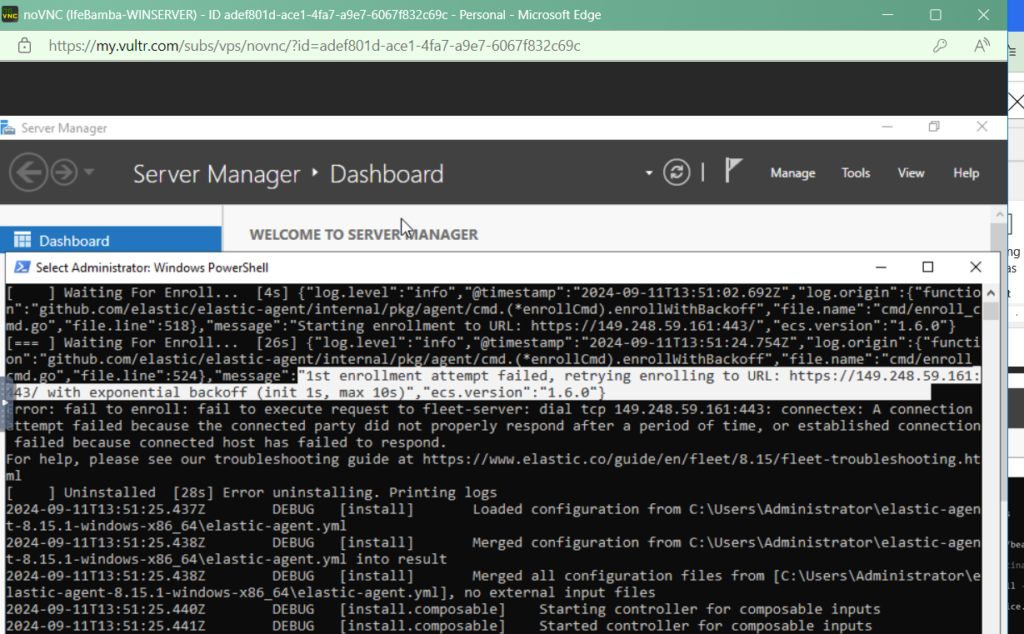
Seeing this, we see that the agent cannot connect to the fleet server that is on IP address: 149.248.59.161 accroding to the error.
To fix this,we modify the firewall on our FLEETSERVER to allow coonections to the Fleet server through port 8220! – where 8220 is the port number we specified earlier when installing the fleet server.
On Fleet server:

We return to the windows Server again and re-run our Agent enrollment: ANOTHR ERROR:
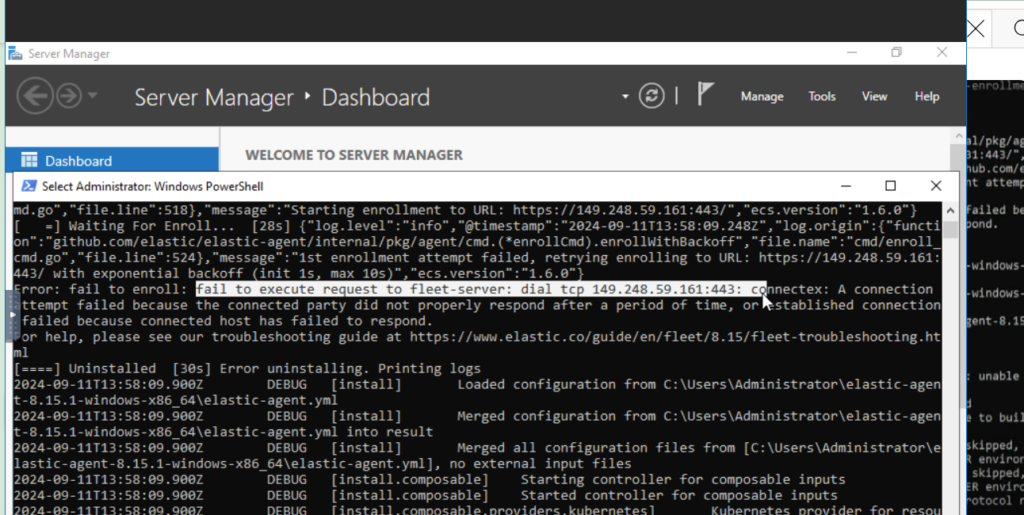
Our Agent is also trying to access port 443 on the fleet server! So, we enable port 443 on the fleet server.

We re-run the comman on the windows server,
Still another error:
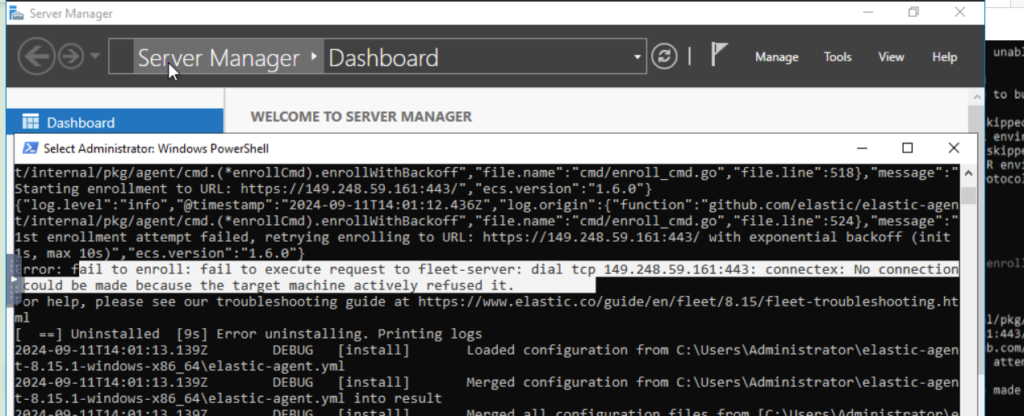
We realized that on the Elastci search fleet server management page, our fleet server defaults to use port 443, instead of 8220

So we edit it to port 8220 and save:
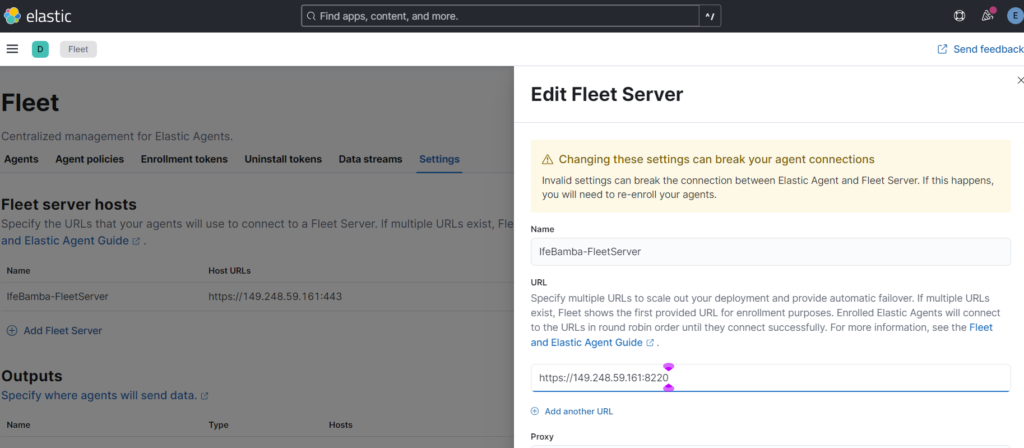
We then modify our install command on the windows server to reflect port 8220 instead of 443!

We get another Error!
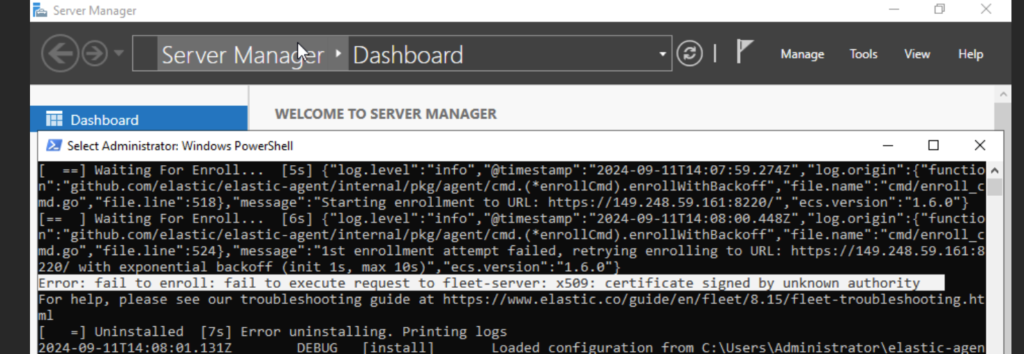
This is because we are using a self-signed certificate – we are not in production envt so this is acceptable, we would have used the advanced option (instead of quickstart option), and we would have had to use a certificate authority (CA) to achieve this.
to bypass this, we insert a –insecure flag in our windows installation command:
Success!:

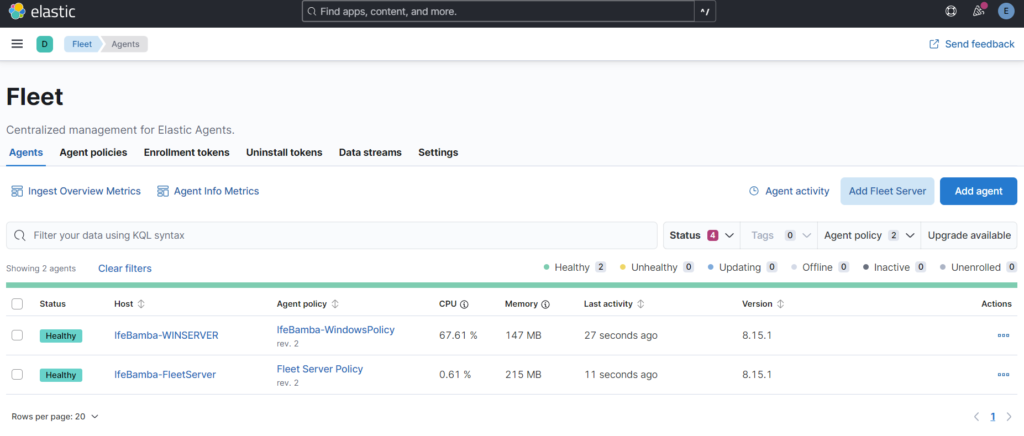
On the ElastcSearch, we check to see the agents installed, and we see that our windows server has successfully enrolled on the fleet server!
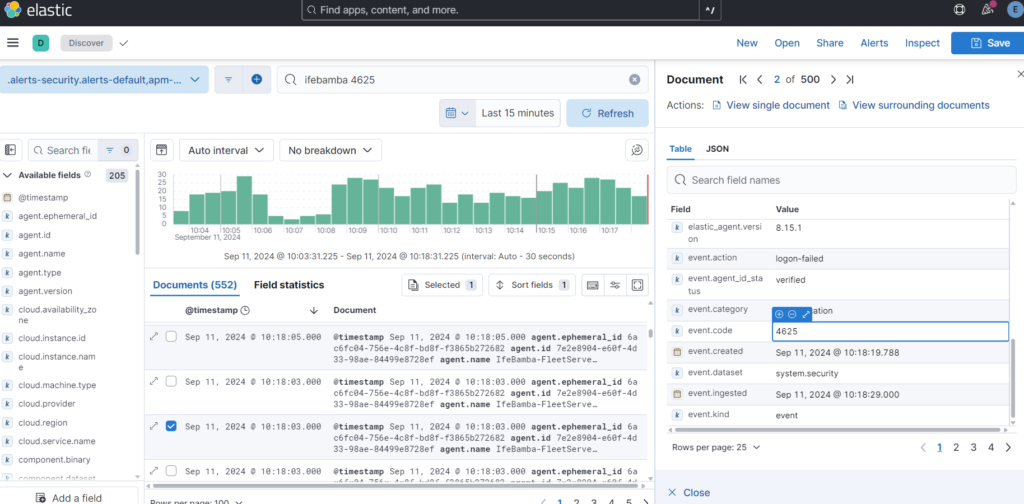
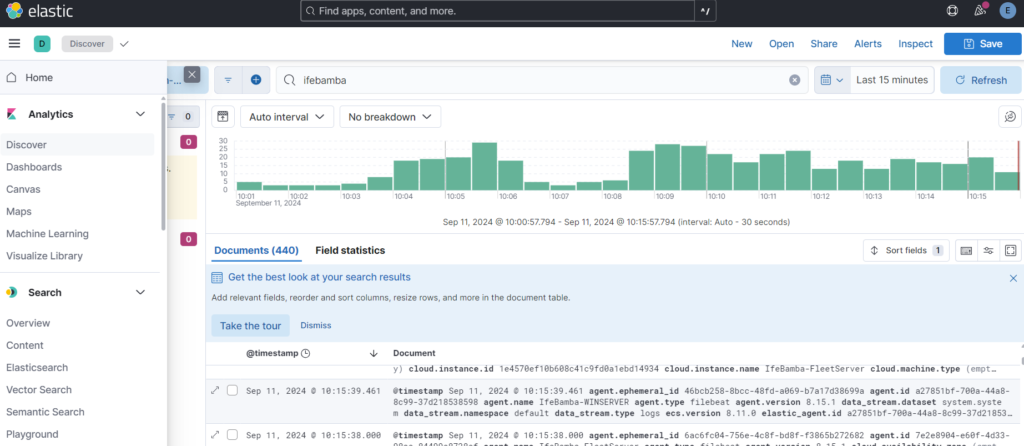
In ES, under the Analytics > Discover page, we see logs being captured:
Sample event code with event log 4625 on our windows server – a failed login attempt
