Investigating the things to look for in a brute force attack
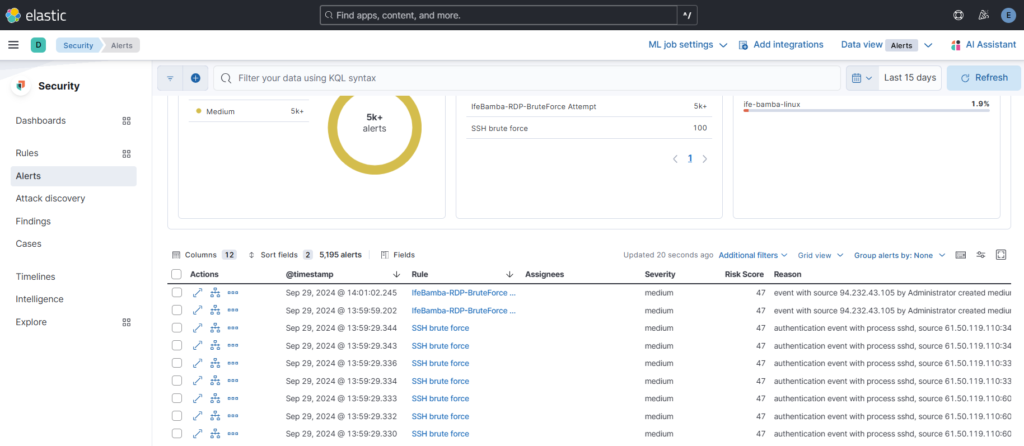
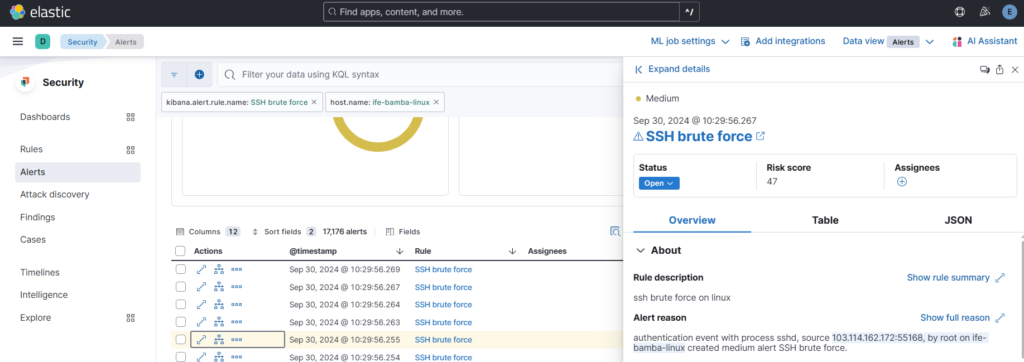
Go to ES > Security > alerts

We look to investigate the following when we investigate an Alert and check its details:
(1) – IP : is this IP known to perform brute force activity?
(2) – Any other users affected by this IP?
(3) – Were any of them successful?
(4) – If so, what activity occurred after the successful login?
(1.) Is this IP known to perform brute force activity?
IP Address :61.50.119.110:4939, by root on ife-bamba-linux

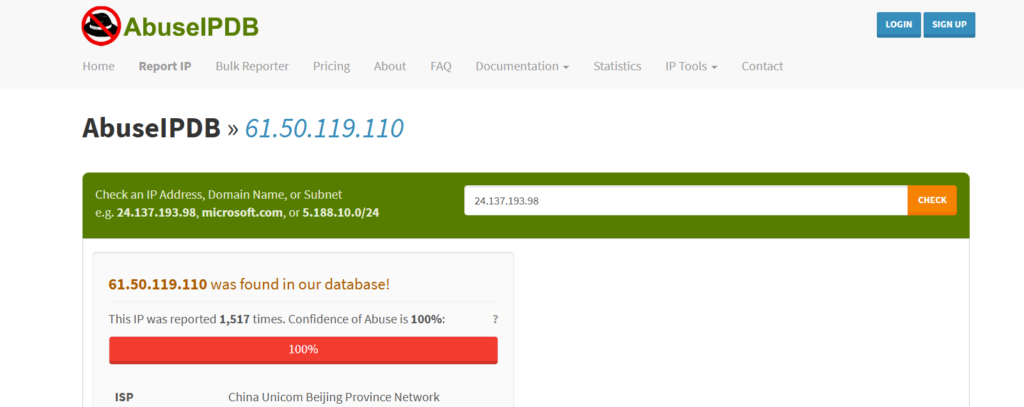
We can search this IP address with OSINT such as:
– AbuseIPDB
– Greynoise


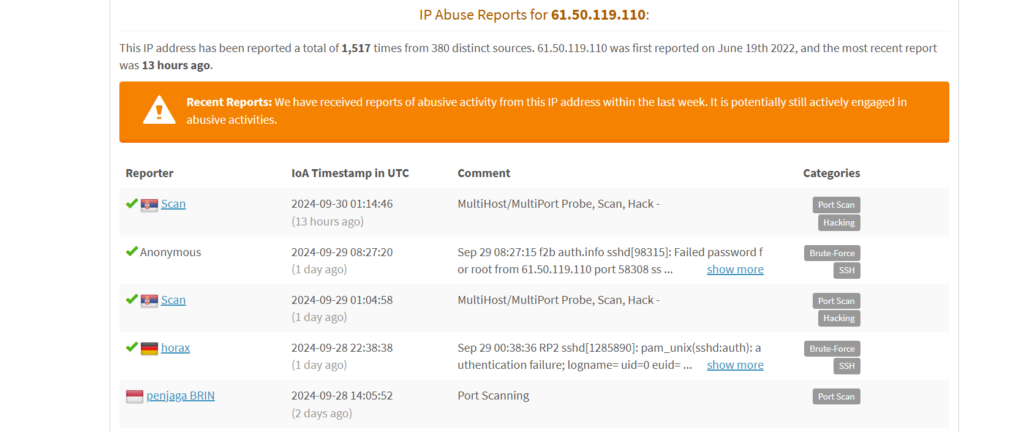
complete report can be seen here: 61.50.119.110 | China Unicom Beijing Province Network | AbuseIPDB
Greynoise report:

We can answer our first question if the IP address is known for malicious activity: YES
(2) Were Any other users affected by this IP?
To test if other users are affected by this attacker, lets return to Kibana and search our ES for this IP:
61.50.119.110 > we get 101,453 records of this IP address.

We can further narrow down this to the username this attacker tried to gain access with; lets narrow down > user.name: root > we get 44,337 results.
Top values using the user.name filter shows us the root account and no other account named.
We can answer our Second question if the IP address is known for attacking other users:No
(In our case, we only find that the account bruteforce attempts is only on the root account).
(3) Did this IP address succeed in any of its brute force attempts?
To be sure, we can also try the failed attempts from this IP:
Answer: No brute force attempt succeeded
Note: The Case of your queries also matter in the results you get. The string “failed” did not yield any results, but “Failed” yielded the result we needed. You have to be sure of the case or query that your atger machine returns. “Accepted” represents successful logins in Linux, so using the string “Successful” would not yield the required results.
(4) If a brute-force attempt success, what activity occurred after the successful login?
In this case, since no brute force attempt succeeded, we cannot answer this question
In this scenario, we can close this alert since we have verified that the attack was no successful
Next, we can push our alerts into our ticketing system (OSTICKET).
ES > Security > Rules > detection Rules > select a rule > Edit rule settings:

click Actions tab > click web hook
We see our osticket connection. In the body, we insert our ticket XML. We can use variable names as seen with the {{rule.name}}. Variable are accessible with the small add variable icon on the right.
Automated Ticket created on osTicket through the SSH brute force Alert Rule:
You can use alert notification variables and placeholders to build/format your ticket in XML.


